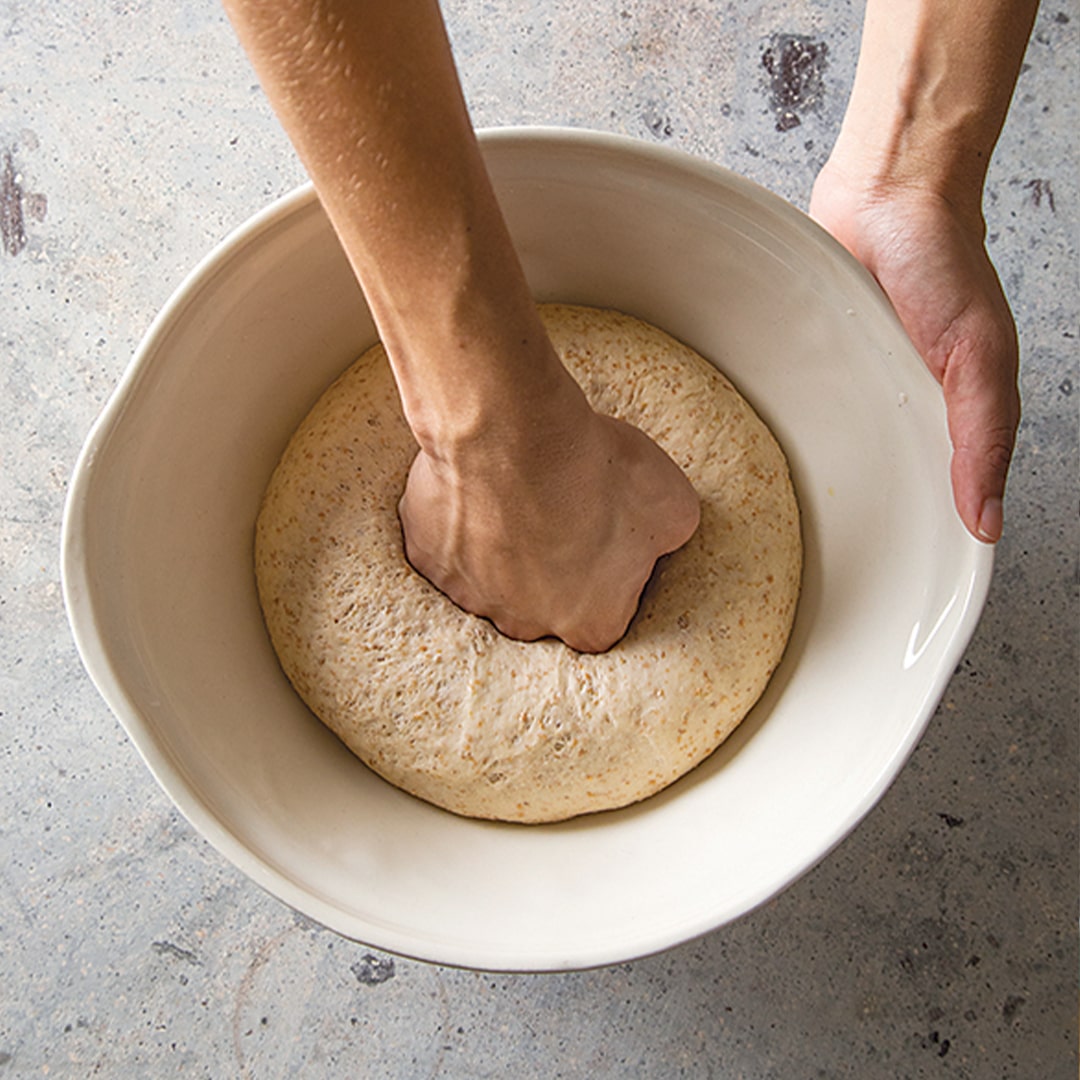
You are currently viewing How to shape a basic bread loaf

How to shape a basic bread loaf

A quick and easy guide on how to shape a basic bread loaf.

Loafing around  

A quick and easy guide on how to shape a basic bread loaf:  

Step 1

Lightly “knock down” the dough to release air that built up when it was resting. This helps “feed” the yeast fresh oxygen.
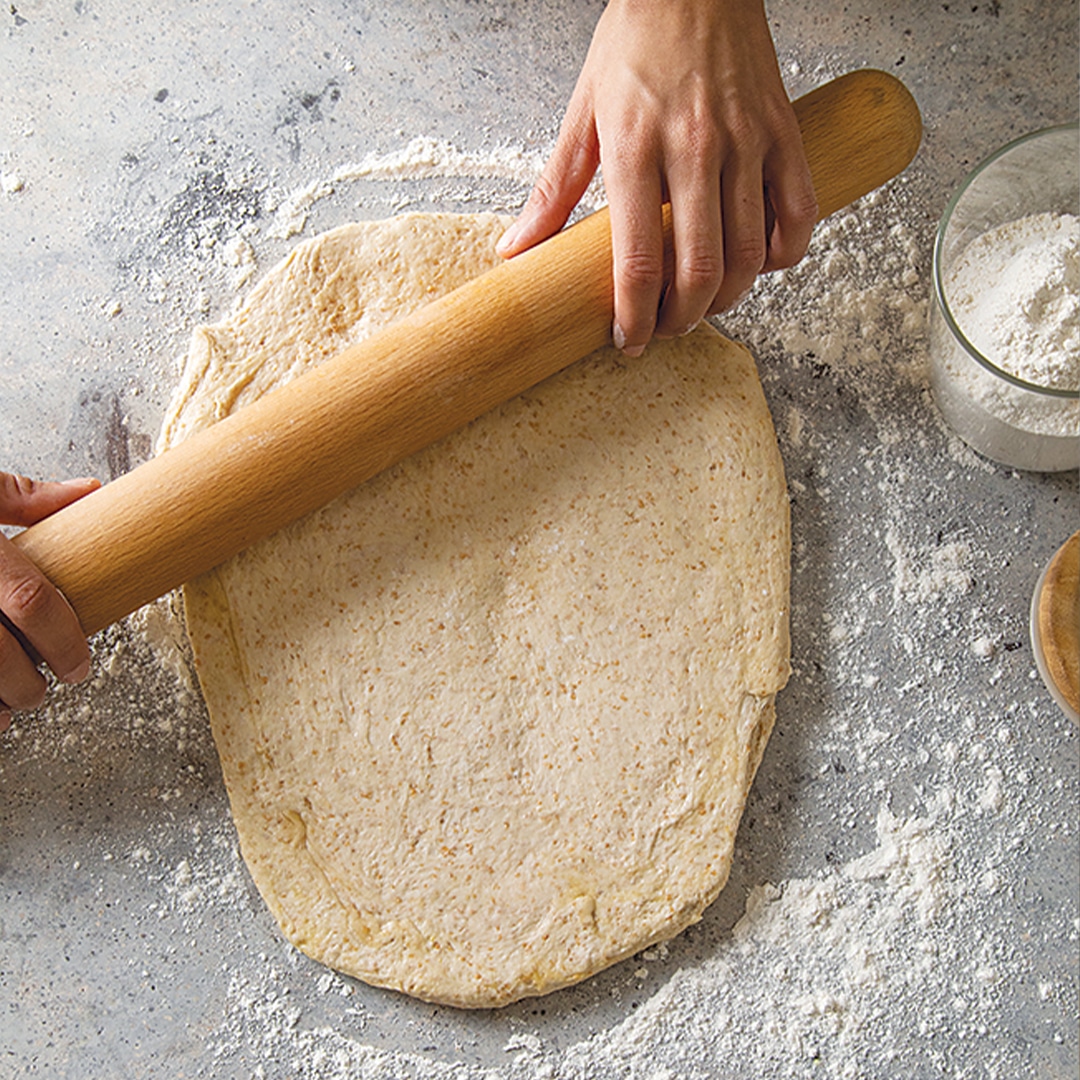
Step 2

Roll out dough on a lightly floured surface into a rectangle, about 2cm thick.  
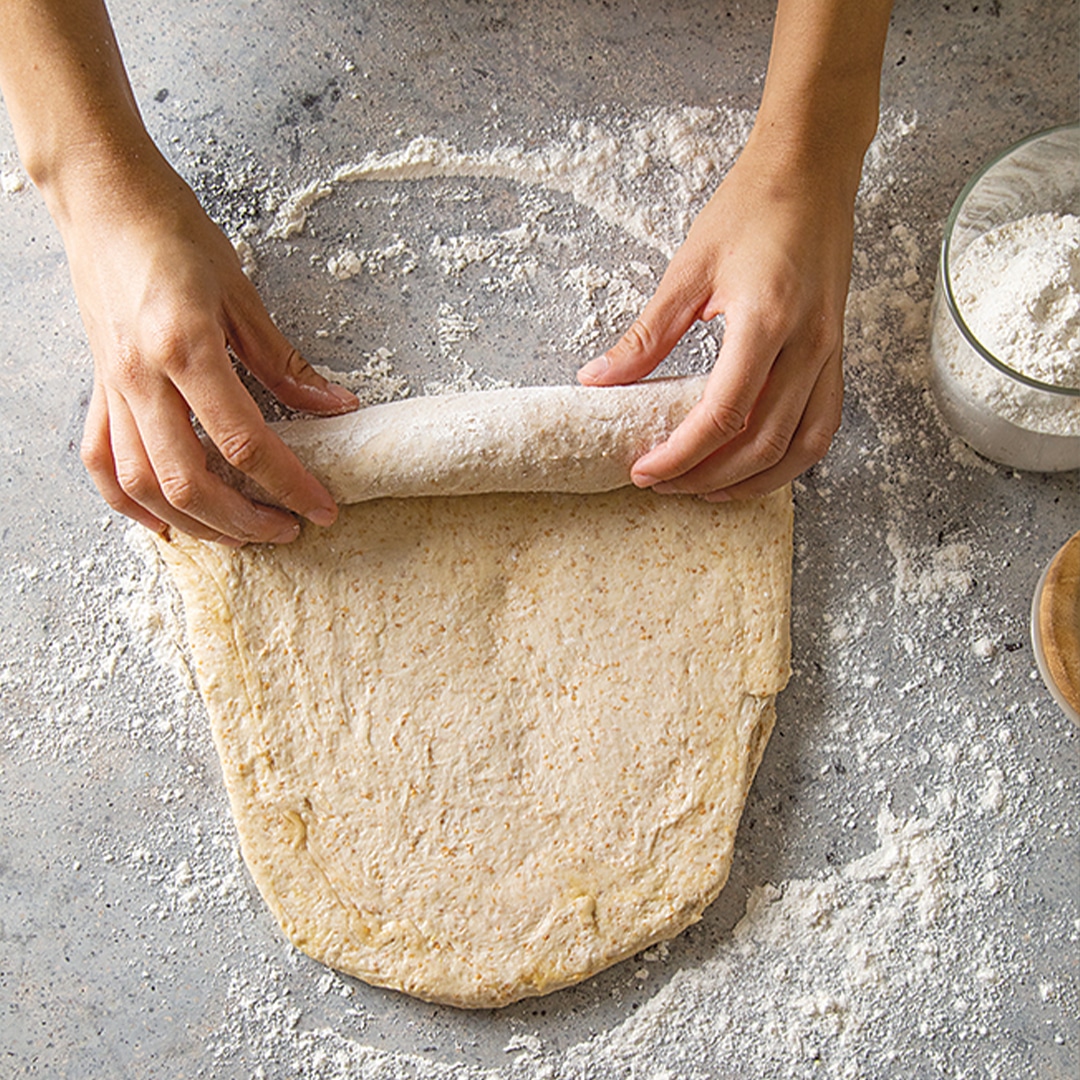
Step 3

Roll dough up into a tight log.
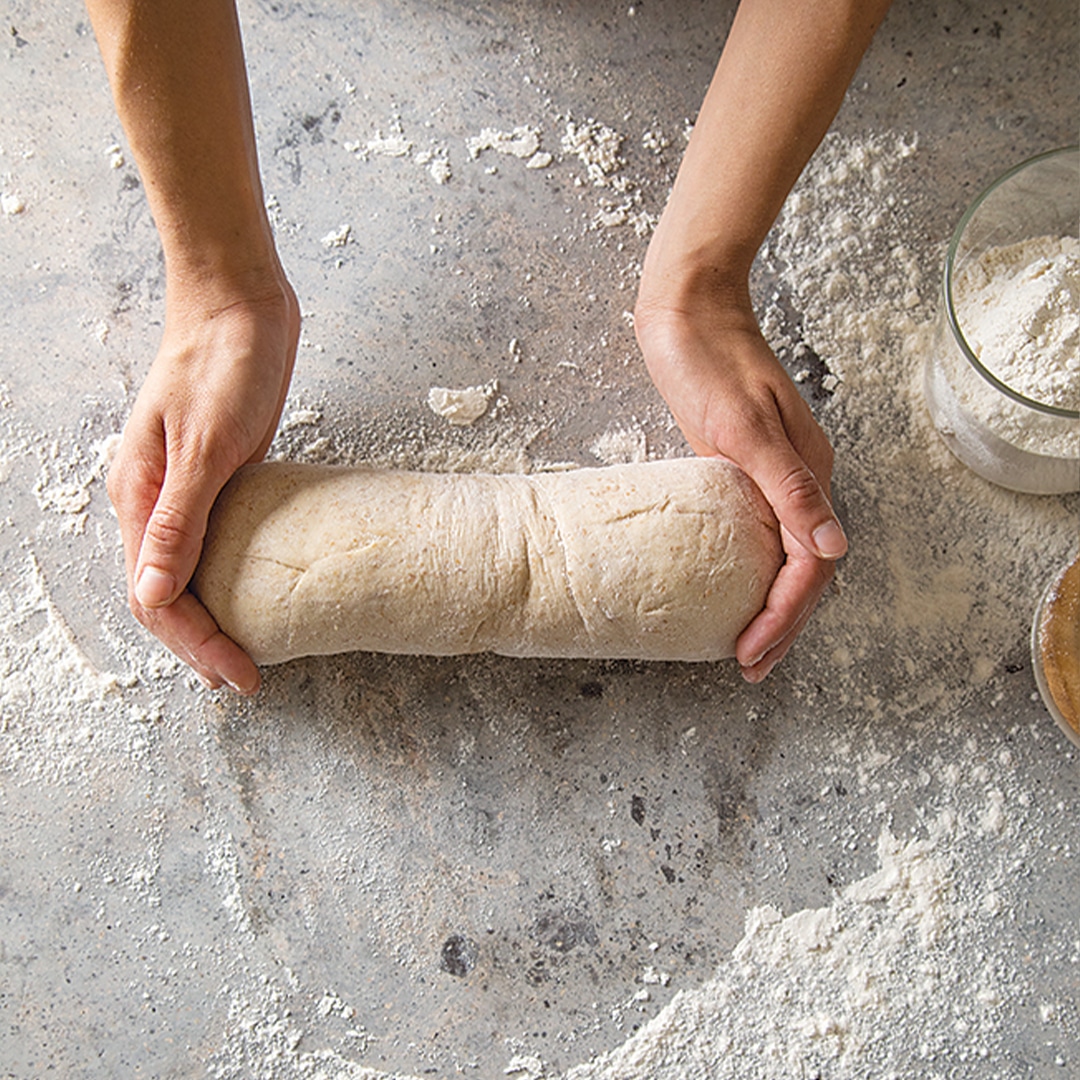
Step 4

Pinch the seam closed with your fingertips and tuck in the corners.  
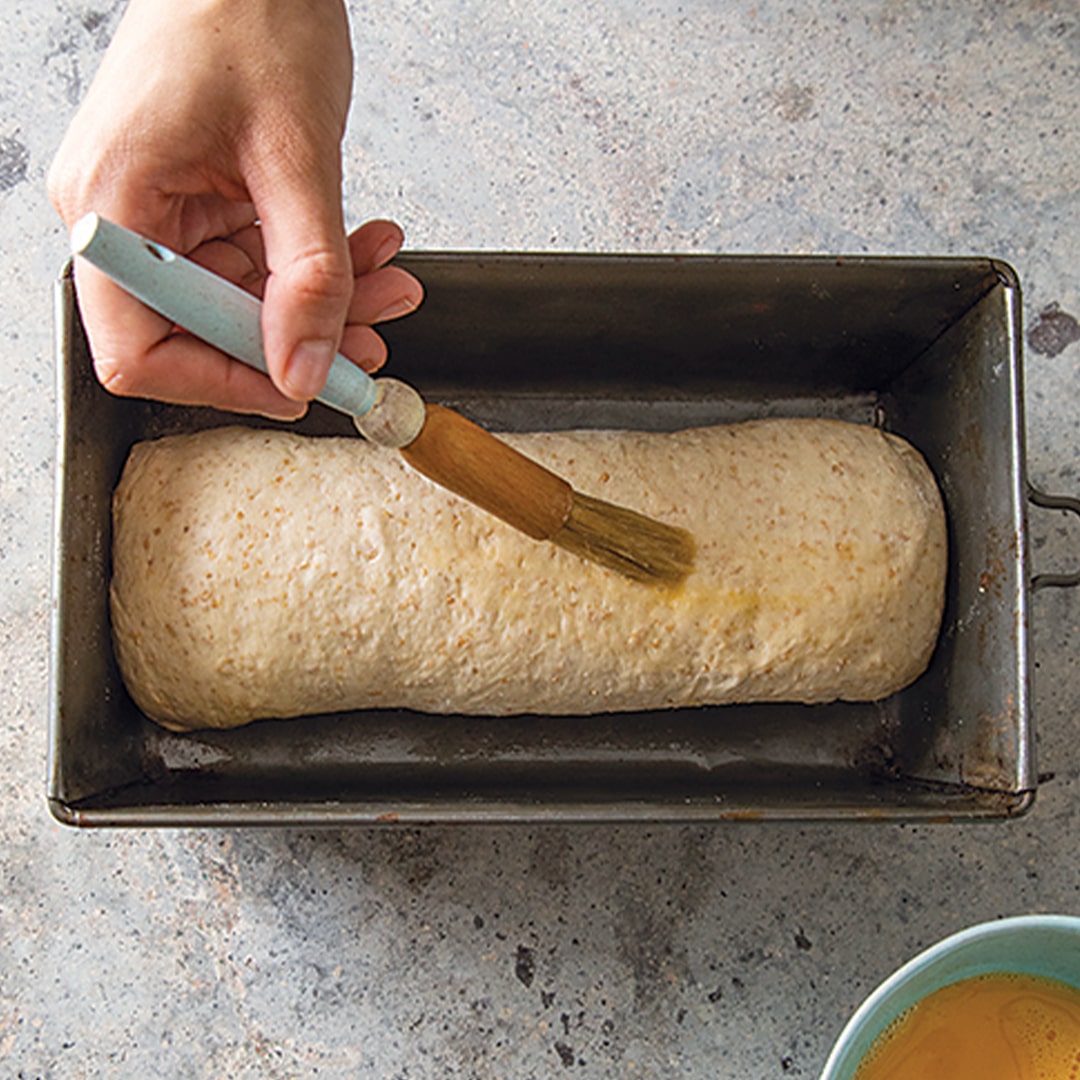
Step 5

Place in prepared loaf tin, brush with egg wash and leave to “prove” for about 30-60 minutes before baking.

NO GLUTEN? NO PROBLEM!  

Gluten-free ouma brood 

Makes 1 loaf (12-15 slices) 

Combine 3 cups (450g) gluten-free flour mix, 1 sachet (10g) instant dry yeast, 1/2 tsp (3ml) cream of tartar, 2 Tbsp (26g) sugar and 2 tsp (10ml) salt. Whisk together 11/2 cups (375ml) lukewarm milk, 1/4 cup (60g) melted unsalted butter, 1 tsp (5ml) vinegar and 2 egg whites. Add milk mixture to flour mixture and combine until smooth. Mix for 3-5 minutes until lump-free. Spoon batter into a greased loaf tin and gently brush surface with olive oil. Sprinkle with seeds if you like. Cover with clingwrap and leave to rise until doubled in size. Preheat oven to 220°C. Bake for 45-50 minutes. Allow to cool in loaf tin for 10 minutes before turning out onto a cooling rack. Slice and serve. Store in a container for 3 days, or freeze in clingwrap for up to 2 weeks. 

Compiled by: Gail Damon
Photographs: Fresh living Magazine  

0 / 5. Vote count: 0