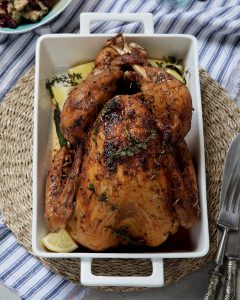

Zorah Booley Samaai comes to our rescue with her tried and tested gluten-free recipes, fit for all occasions.
Baking is for everyone. This is what Zorah Booley Samaai shows us with her book The South African Guide to Gluten-Free Baking. She gained widespread recognition with her blog In the Midnight Kitchen, where she poured her heart out, gaining followers through her exciting, inclusive recipes.
While going through her journey with IBS (irritable bowel syndrome), Zorah aims to make living and eating less daunting and more inspiring, showing those with the same issue how to love cooking despite the restrictions that come with IBS. Her book breaks down the science behind different flours, raising and binding agents, as well as a section on how to stock up your pantry. Here’s a sample of our favourite recipes from this fabulous local cookbook.
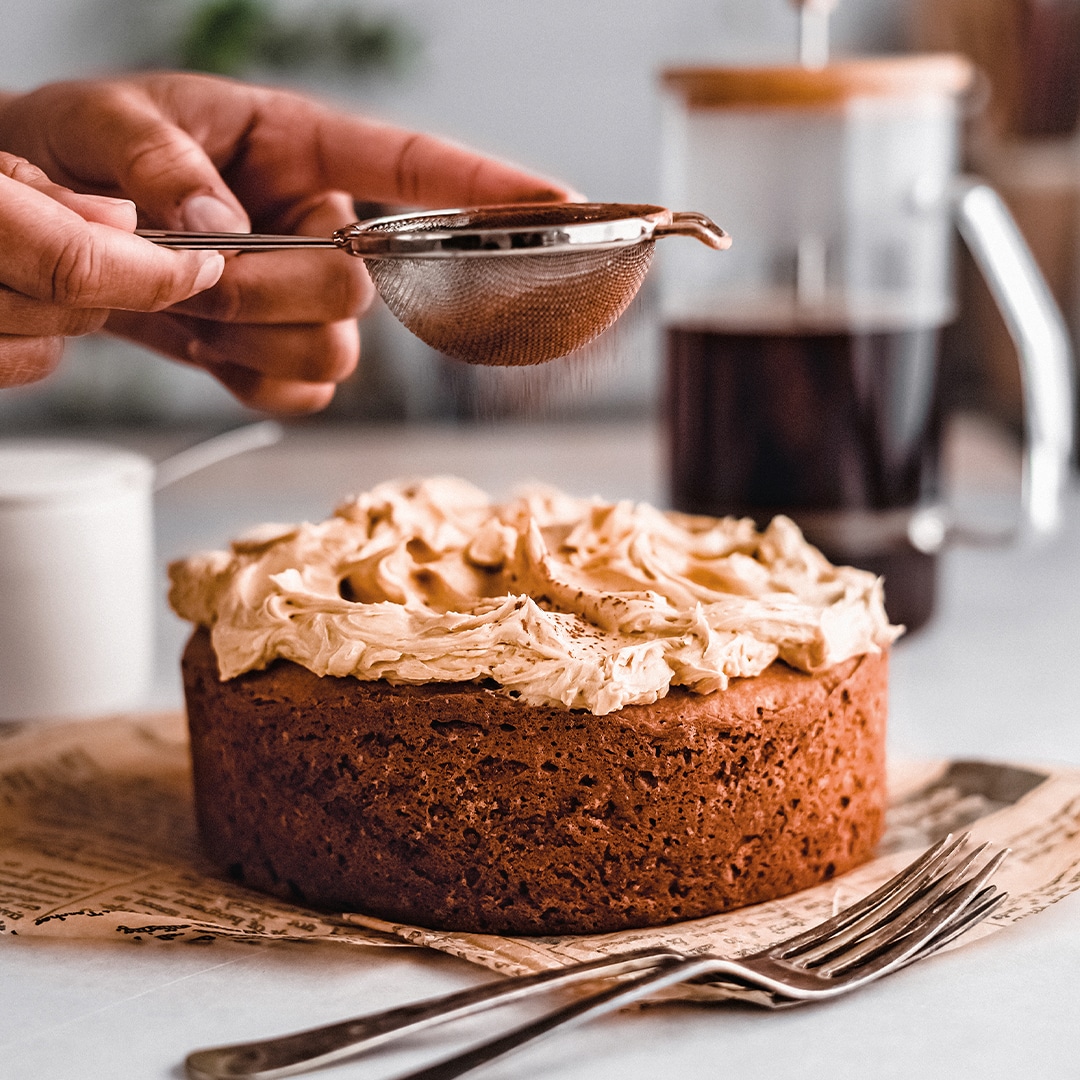
Coffee cake
Serves 10-12
Ingredients
For the coffee cake
120ml full-cream milk
3 Tbsp instant coffee granules
140g salted butter, room temperature
100g brown sugar
80g white sugar
2 tsp vanilla extract
3 large eggs, room temperature
220g gluten-free all-purpose flour
¾ tsp xanthan gum (omit if it contains flour)
60g almond flour
2½ tsp baking powder
For the coffee frosting
300ml whipping cream
3 Tbsp instant cappuccino powder
2 Tbsp instant coffee granules (omit if you don’t want a strong coffee taste)
75g icing sugar, sifted
1 Tbsp cocoa powder or milk chocolate shavings, to decorate
Method
- Preheat the oven to 180°C.
- Spray a 20cm round baking tin with nonstick spray and line the base with baking paper. Spray with nonstick spray and set aside.
- To make the coffee cake, heat the milk and instant coffee granules together in a small saucepan, until the coffee has dissolved. Once the mixture starts steaming, remove from the heat and set aside to cool.
- In the bowl of a stand mixer fitted with a creaming attachment, or using an electric hand mixer or whisk, cream together the butter, brown and white sugar, and vanilla extract on medium speed, until light and fluffy, making sure to scrape down the sides of the bowl often to incorporate the mixture evenly. Then, add the eggs, one at a time, and mix to combine, until light and fluffy.
- In a separate bowl, combine the all-purpose flour, xanthan gum (if needed), almond flour and baking powder, and whisk to remove any lumps.
- With the speed of the mixer on low to avoid splatter, add one-third of the dry ingredient-mixture to the wet ingredients and, when just combined, add one-third of the coffee-milk mixture.
- Continue adding the dry ingredients and coffee-milk mixture one-third at a time, scraping down the sides of the bowl each time to incorporate the mixture evenly. The batter should be thick and light in colour, with very few lumps, although it does not have to be completely smooth.
- Transfer the batter to the prepared baking tin and smooth the top using a spatula.
- Bake in the oven for 35 minutes, then insert a toothpick into the centre. If it doesn’t come out clean, bake for a further 5-7 minutes (see Notes and Tips).
- Remove from the oven and allow to coolin the tin for 15 minutes. Then, transfer the cake to a wire rack to cool completely before frosting.
- To make the coffee frosting, in a small pot, heat together one-third (100ml) of the whipping cream, the instant cappuccino powder and instant coffee granules (if using), stirring constantly until dissolved. When the mixture starts to steam, remove from the heat and set aside to cool.
- In the bowl of a stand mixer fitted with the whisk attachment, whisk together the remaining cream (200ml) and icing sugar until soft-medium peaks form. You can also do this using an electric hand-whisk.
- With the mixer on medium speed, add one tablespoon of the cooled coffee-cream mixture at a time to the whipped cream mixture. Alternatively, you can pour it in, but do so at a very slow pace so that the mixture does not deflate.
- Once combined, keep whisking until stiff peaks form.
- Smooth the coffee frosting over the cooled cake.
- Top with a dusting of cocoa powder or decorate with milk chocolate shavings.
Notes and tips
Why did the cake deflate? If your cake is underbaked, it will collapse. Only at the 35-minute mark should you open the oven to do the toothpick test to see if it is ready. Letting the air out of the oven will also cause the cake to deflate. If the cake is still not done at the 35-minute mark, cover with foil to prevent burning and bake for another 5-7 minutes.
Storage
Cut the cake into slices and place it in a container in the fridge, or cover the whole cake in cling wrap and refrigerate. Before eating, let it come to room temperature or microwave for 10 seconds.
Baked double chocolate doughnuts
Makes 6-8
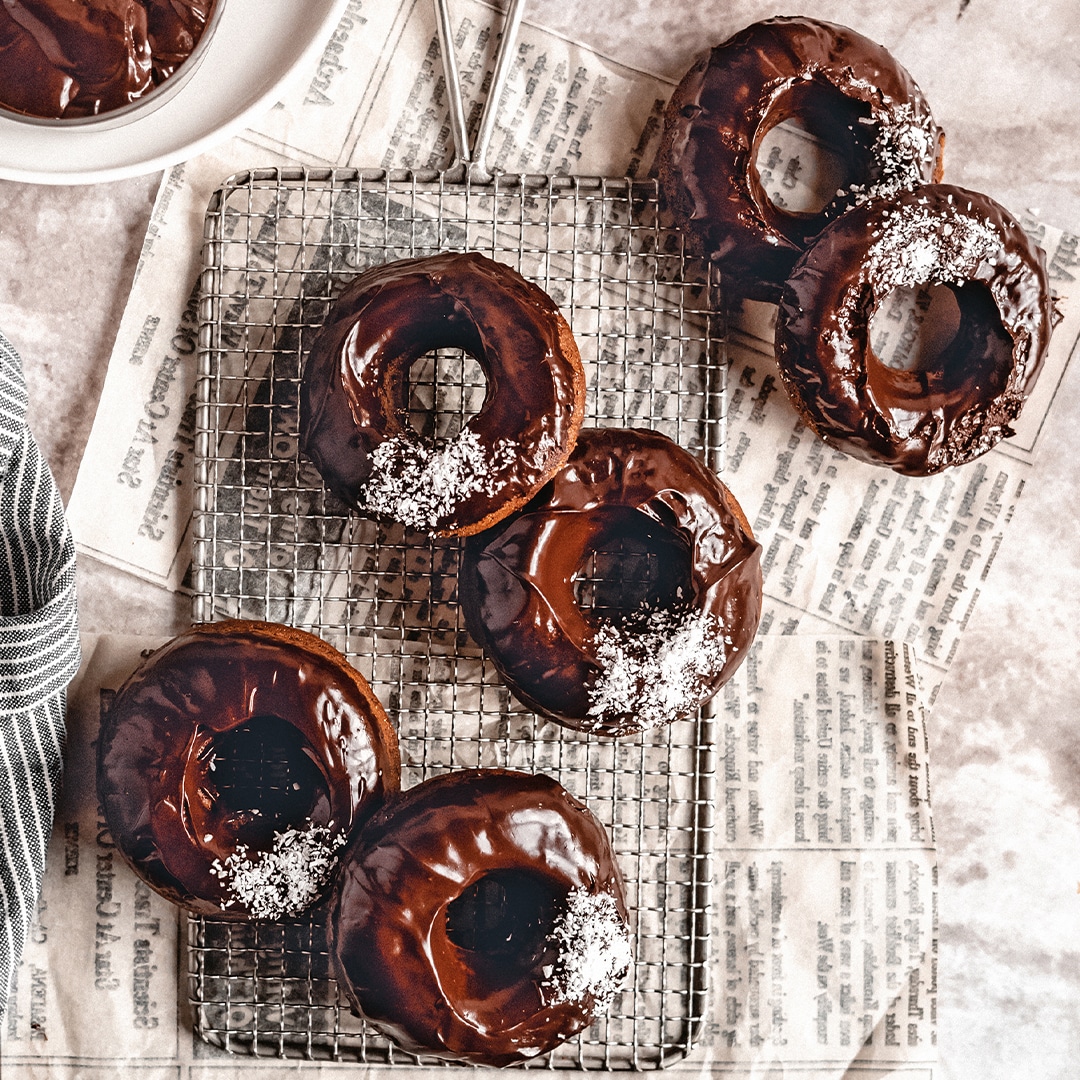
These chocolate doughnuts are a dream! They are light and airy, and have a rich chocolate ganache topping. If you are a chocolate lover, these will easily become a favourite!
Ingredients
For the doughnuts
130g gluten-free all-purpose flour
½ tsp xanthan gum (omit if it contains flour)
2½ Tbsp cocoa powder, sifted
70g light brown sugar
1 tsp baking powder
½ tsp bicarbonate of soda
1 tsp gluten-free hot chocolate powder
130ml full-cream milk
1 large egg, room temperature
30g butter, melted
1 tsp vanilla extract
1 tsp white vinegar
For the chocolate ganache
160g 70% dark chocolate, chopped into small pieces
135ml whipping cream
For the topping
25-30g desiccated coconut or chopped nuts
Method
- Preheat the oven to 175°C. Lightly spray a doughnut pan with nonstick spray. Set aside.
- To make the doughnuts, add the flour, xanthan gum (if needed), cocoa powder, sugar, baking powder, bicarbonate of soda and hot chocolate powder to a bowl. Whisk to remove any lumps.
- In a separate bowl, whisk together the milk, egg, melted butter, vanilla extract and white vinegar until combined.
- Add the wet-ingredient mixture to the dry, and whisk to combine. The batter should be smooth with a dropping consistency.
- Place the batter in a piping bag.
- Fill the rings of the doughnut pan about three-quarters of the way full. Alternatively, spoon the batter into the pan. Make sure the batter fills each ring of the pan evenly, or some doughnuts will end up drier than others.
- Tap the doughnut pan on the counter to level out the batter and remove any air bubbles. Bake in the oven for 9-11 minutes.
- Remove from the oven and allow to cool in the pan for 10 minutes before transferring to a wire rack to cool completely.
- To make the chocolate ganache, place the chopped dark chocolate in a heat-proof glass or metal bowl.
- Warm the cream in a small saucepan over medium heat. When it begins to steam and you see small bubbles forming on the edges of the pot, remove the cream from the heat and pour it over the chopped chocolate.
- Let the cream sit on the chocolate for about 30 seconds before mixing with a spatula, starting by making small circles with the spatula in the centre of the bowl and gradually moving outwards, incorporating more chocolate as you go. If the chocolate doesn’t melt, the cream is not warm enough.
- Place the chocolate and cream mixture in the microwave for 10 seconds at a time, stirring every time to combine. The mixture should look smooth and glossy. Then, cover with cling wrap and place in the fridge for about 20 minutes, stirring every 5 minutes. This helps to thicken the ganache so it will coat the doughnuts nicely.
- When ready to use, the ganache should be completely cooled and thickened, although still liquid enough to coat the doughnuts nicely.
- Dip the doughnuts in the ganache, let the excess drip off, then rest on a wire rack to set.
- Sprinkle over some desiccated coconut or chopped nuts, and enjoy!
My famous zesty key lime pie
Makes 1 x 23cm pie

I have been making this key lime pie for so many years. I love that the tart lime flavour is met with the perfect amount of sweetness. It is encased in a sweet biscuit base crust and the taste is honestly superb! It will easily be a hit when it’s time for dessert.
Ingredients
For the biscuit base
190g gluten-free digestive biscuits (I like the ones from the brand Schär)
¼ tsp xanthan gum
2 Tbsp white or brown sugar
50ml melted butter
For the filling
3 large egg yolks
1 Tbsp finely grated lime zest
1 x 385g can sweetened condensed milk
120ml lime juice
1 tsp vanilla extract
For the topping
125ml whipping cream
1 Tbsp finely grated lime zest
1 lime, sliced, to decorate
Method
- Preheat the oven to 175ºC. Lightly grease a 23cm round pie dish with nonstick spray and set aside.
- To make the biscuit base, add the digestive biscuits, xanthan gum and sugar to the bowl of a food processor, and blitz until the biscuits take on a sandy texture.
- Add the melted butter and blitz again. If you don’t have a food processor, add the biscuits and xanthan gum to a Ziplock bag. Use a rolling pin to crush the biscuits before adding them to a bowl along with the butter, and mixing well.
- Add the mixture to the prepared pie dish and press down firmly into the base and up the sides of the dish. You can use the bottom of a glass to make sure the mixture is packed tightly enough.
- Bake for 8–10 minutes, or until lightly browned and fragrant.
- Remove the base from the oven and set aside to cool, then reduce the oven’s temperature to 160ºC.
- To make the filling, add the egg yolks and lime zest to the bowl of a stand mixer fitted with the whisk attachment.
- Beat on high for about 4 minutes. You can also add the ingredients to a bowl and use an electric whisk to achieve the same result.
- Stop whisking and add the condensed milk. Whisk for 3–4 minutes, then add the lime juice and vanilla extract.
- Whisk again for about 2 minutes until combined, scraping down the sides of the bowl as you go.
- Pour the filling through a mesh strainer to remove any lumps. Then, pour the strained filling into the pie dish.
- Bake for 25 minutes, until the edges are set and the centre is still slightly jiggly. Remove from the oven and let it cool to room temperature before transferring to the fridge.
- Allow to set in the fridge for at least 2–3 hours, or overnight.
- To make the topping, whisk the whipping cream to stiff peaks on high speed for 5–8 minutes.
- Dollop the whipped cream over the chilled pie (use the back of a spoon to smooth it out, if you like).
- Sprinkle over the grated lime zest and decorate with lime slices.
Storage
The key lime pie will keep for up to 5 days in the fridge. Make sure to cover it well with cling wrap.
Notes and tips
Can I use lemon juice if I don’t have limes? Recipes are meant to be stress-free, so of course you can! It won’t affect the outcome, apart from the taste, which will obviously be more lemony.

The South African Guide to Gluten-Free Baking by Zorah Booley Samaai is available online and in all local bookstores.
Compiled by Sjaan van der Ploeg
Recipes: Zorah Booley Samaai
Photographs: Junaid Samaai
Extract from The South African Guide to Gluten-Free Baking, Courtesy of Penguin Random House South Africa