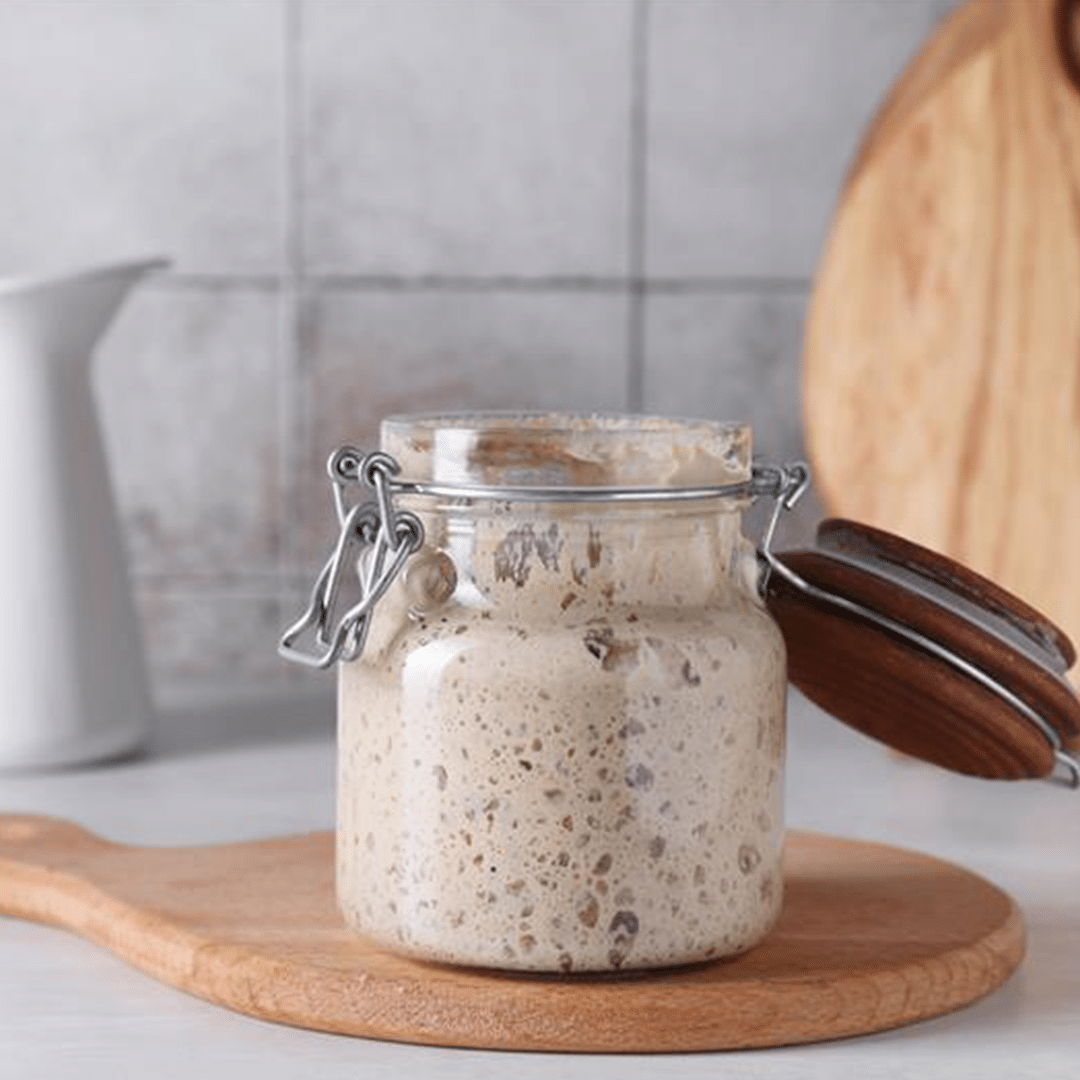
What is a sourdough starter?
A sourdough starter is a living, fermented culture of flour and water that serves as a natural leavening (or rising) agent for baking. A starter consists of a symbiotic community of wild yeast and beneficial bacteria (mostly lactic acid bacteria) that are collected from the environment and the flour itself – in contrast to commercial yeast, which has a single concentrated strain.
When you make your starter, you are creating a living, bubbling jar of wild yeast. You will need to take good care of the starter and, rumour has it, it’s good practice to give your starter a name; after all, it is a living organism. (My starter is called Mother Doughresa). Your starter will need food, warmth and a little attention – but don’t worry, it won’t bite.
The starter should have a sour, tangy smell. If it smells truly awful (like garbage), start over.
Let’s dive right in!
What you’ll need
- Flour (bread, rye or whole wheat)
- Lukewarm water
- Jar or container (not airtight!)
- Silicone spatula
- Patience (about 7 days’ worth)
Day-by-day sourdough starter instructions
Notes
- Keep your jar in a warm, toasty area in the kitchen but out of direct sunlight.
- To kickstart your starter, use rye flour. It expedites the fermentation process. In comparison to white flour, rye flour is teeming with extra nutrients that help kickstart the entire process. If you don’t have rye flour, a good-quality organic whole wheat will also work.
- Do not use the discard in recipes until your starter is mature enough (from around Day 7).
Day 1: Where the Magic Starts
Mix:
100g rye flour
125g lukewarm water
Stir until thick, like pancake batter.
Loosely cover the jar (lid resting on top or cloth + rubber band).
Leave it on the counter.
Starter status: Shy. Very quiet.
Day 2: “Is Something Happening?”
You might see bubbles. Or nothing. Both are normal.
Weigh out 75g of the starter and discard the rest.
Feed it:
50g rye flour
50g white bread flour
120g lukewarm water
Mix, cover and leave on the counter.
Starter status: Confused, but trying.
Days 3 – 6: The Funky Phase
It may start to smell sour. This is normal. Promise.
And bubbles – yay!
Repeat Day 2:
Weigh out 75g of the starter and discard the rest.
Feed it:
50g rye flour
50g white bread flour
120g lukewarm water
Mix, cover and leave on the counter.
Starter status: Feeling confident.
Day 7 + Onwards: Ready to Bake
If it rises reliably and passes the float test (a spoonful floats in water), it’s ready!
Congratulations. You now own a sourdough starter.
From here on you can feed the starter with just bread flour, if you prefer.
Starter status: Baking queen.
Keeping the starter alive
To keep the starter alive, you will need to feed it:
– every few days if you are planning to bake often.
– weekly or every second week if you don’t bake often.
Store the starter in the fridge.
A starter can last for weeks and even months. Some famous bakeries around the world have starters they’ve nurtured for years, decades and even centuries.
How to know when it’s ready to be used
- Your sourdough starter smells sweet and yeasty.
- It has at least doubled in size (usually with a dome top that is just beginning to flatten).
- It’s bubbly.
- It passes the ‘float test’ – a tiny dollop floats in water, indicating peak activity for baking.
If all of the above is present, it’s good to go. In order to maximise the leavening power for your bread, you should use it at its peak, just as it begins to flatten.
Sourdough discard
This is the starter that is thrown out/discarded when feeding the starter. Do not waste it!
You can make sourdough pancakes or waffles, crackers, flatbreads or naan, banana bread or muffins and even biscuits using the discard from Day 7 onwards.
Happy baking!
This delicious pizza recipe is the perfect excuse to use your sourdough starter.
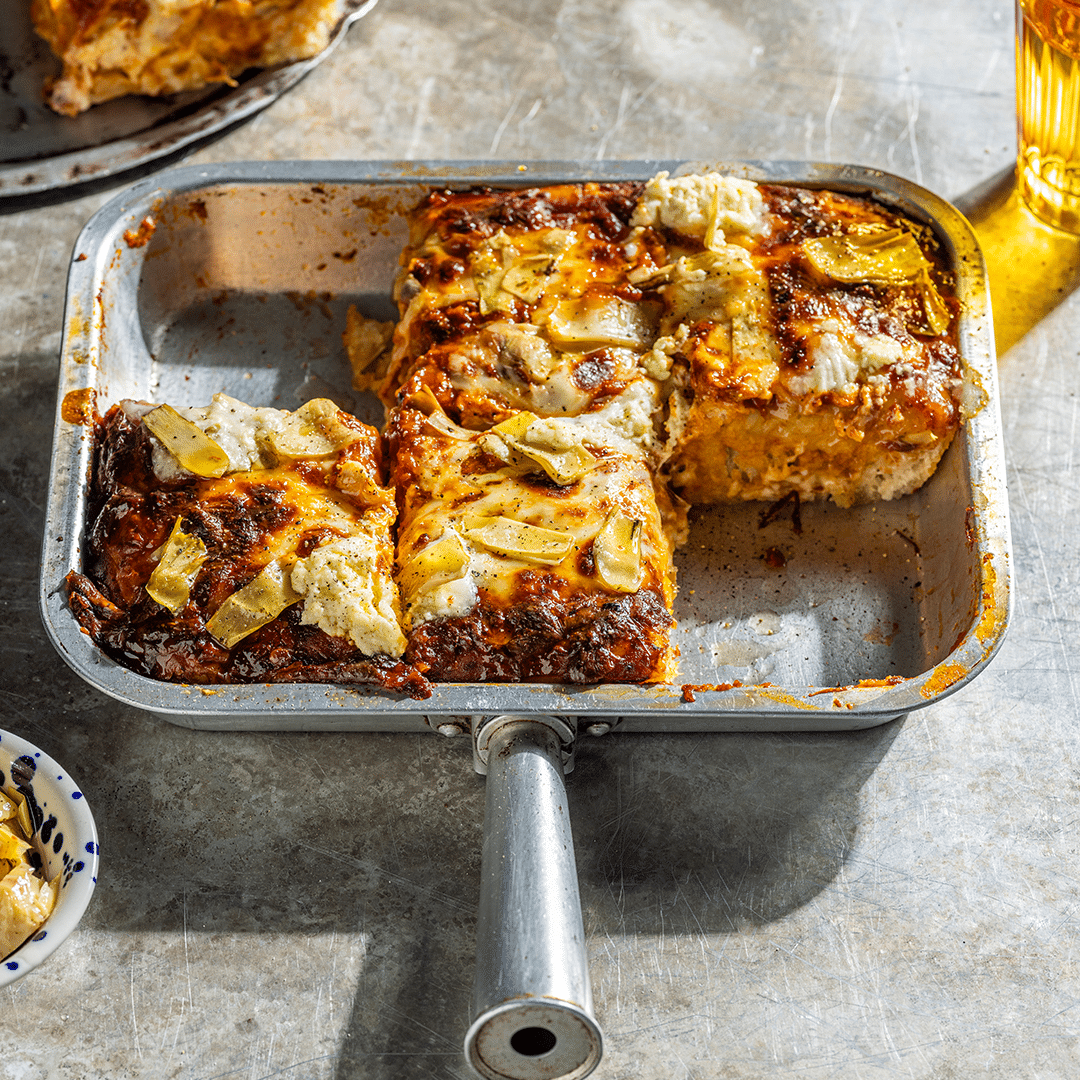
Artichoke and burrata sourdough Sicilian pizza
A thick, chewy, fluffy crust that resembles bread and is usually rectangular in shape.
Makes 1 (30 x 21cm) pizza
Ingredients
For the dough:
1⅖ cup (330g) water
½ cup (100g) active sourdough starter
2½ tsp (12.5ml) olive oil
4¼ cups (525g) OO flour
2 heaped tsp (13g) salt
3 Tbsp olive oil
½ cup pizza sauce
1 cup (150g packed) grated mozzarella
¼ cup marinated artichokes, drained and torn
1 ball (125g) burrata cheese, torn
Salt and milled pepper
Olive oil or chilli oil, for drizzling
Method
- Before you start, make sure your sourdough starter is bubbling and active, it can be fed a few hours before the dough is mixed.
- Dissolve the active sourdough starter in water in a large mixing bowl. Add the olive oil and stir.
- Mix in the flour and salt until a rough dough is formed.
- Cover the dough with cling wrap directly on the surface and rest in a warm area for 30 minutes.
- Stretch and fold the dough eight to ten times by reaching into the bowl and drawing it up and into the middle. At 30-minute intervals, repeat this procedure twice more.
- For a more developed flavour, the dough can be refrigerated for 24 – 72 hours, or left at room temperature for 6 to 12 hours.
- Remove the dough from the fridge and set it on the counter to rest at room temperature for 30-60 minutes.
- Generously grease a 30 x 21cm deep baking dish with olive oil.
- Gently move the dough to the prepared baking dish. To fill the pan, gently squeeze and stretch the dough with your hands. If the dough resists to fill the pan, cover and let it rest for an additional 15-20 minutes covered before continuing to stretch out the dough.
- After the dough fills the pan, use your fingers and dimple the dough as you would for focaccia. Let it rise at room temperature for at least two hours, or until it has risen properly and is puffy.
- Preheat the oven to its highest temperature setting.
- Bake the base for about 20 minutes.
- Remove pizza and lower the oven temperature to 180°C.
- Spread the pizza sauce over the base followed by the mozzarella, artichokes and burrata. Season.
- Bake for another 20 minutes or until the crust is golden and the cheese melted and bubbly.
- Remove pizza from oven and cool slightly. Cut into rectangular pieces, drizzle with some olive oil or chilli oil and serve warm.
Words: Lichelle May
Photography Shutterstock, Zhann Solomons